Simple Player Controller
For the first developer blog post, I thought I should go over something simple and integral to nearly every game, the player. I’ll walk you through how I created the player controller, and the simple way that the player is able to interact with other game objects.
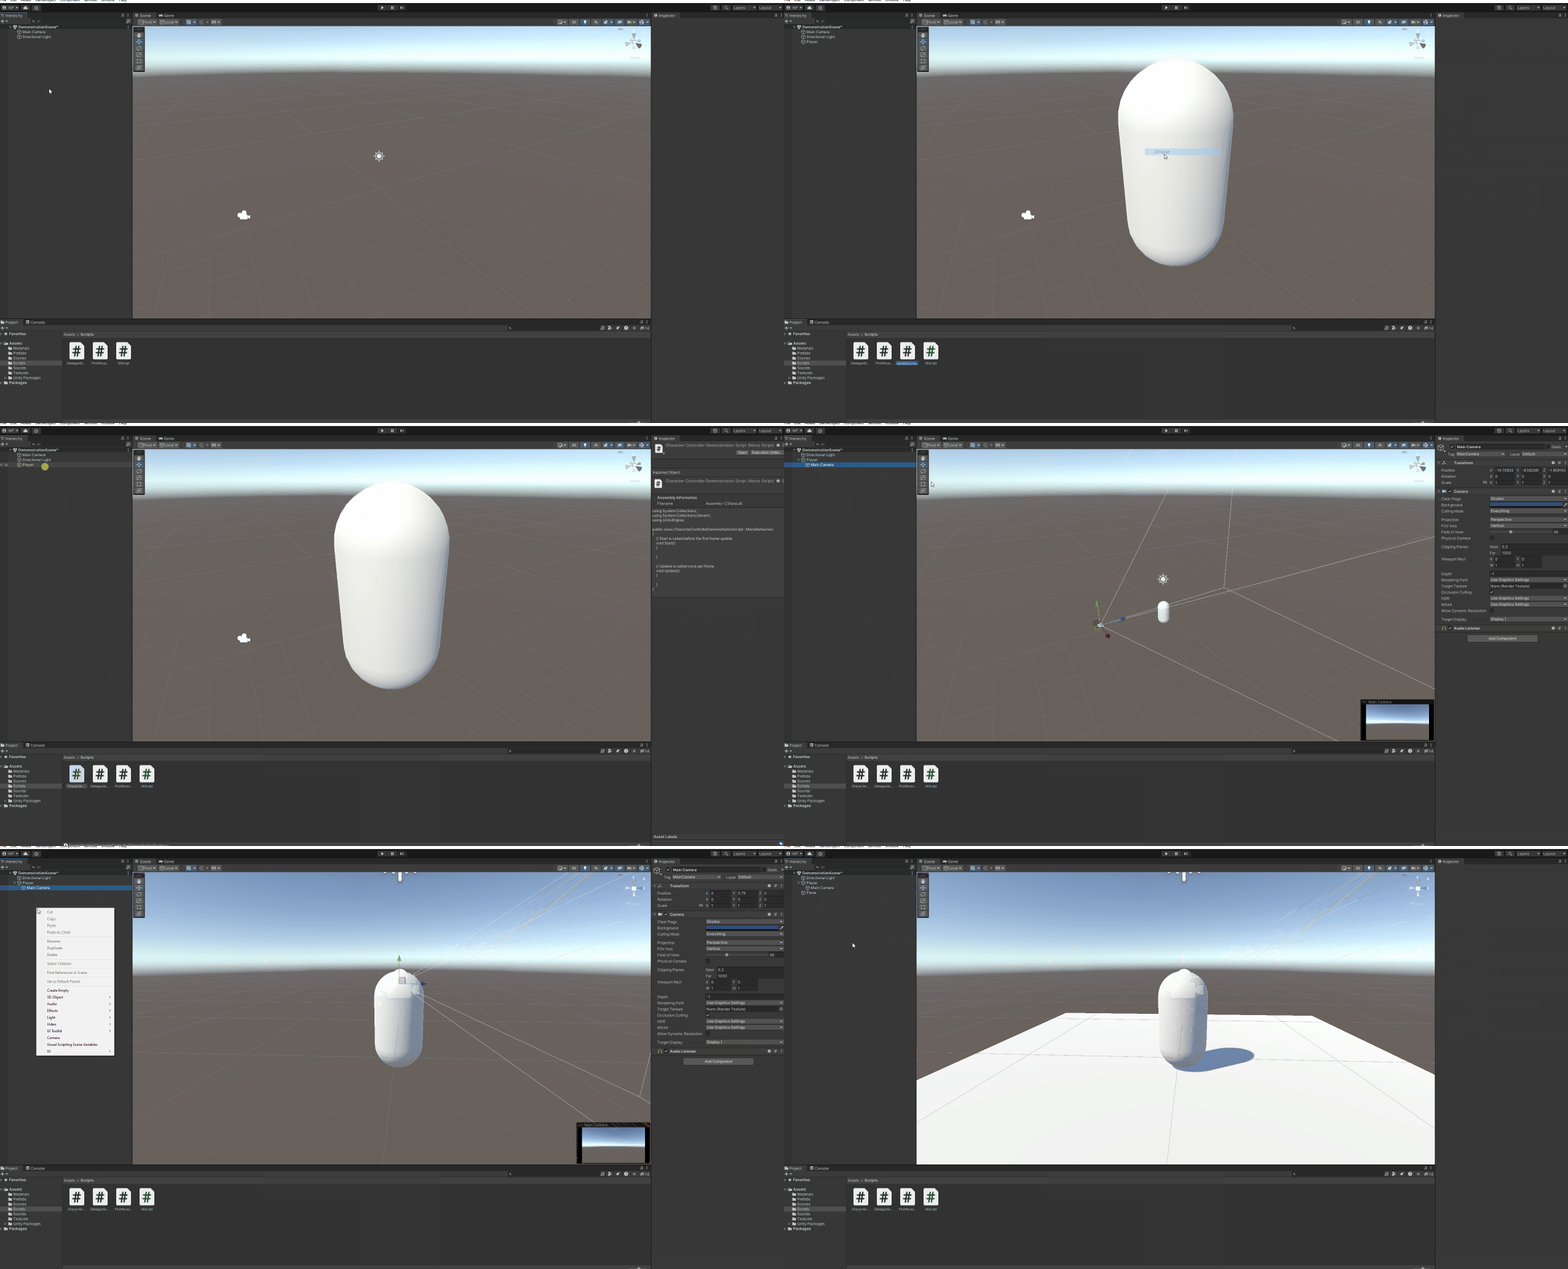
First we will start by creating a new scene to work in.
In the new scene I will make a plane for the player to walk around on, a capsule for the actual player, then I will make the main camera a child of the capsule, and attach a script to the capsule as well as a CharacterController component.

Opening the script, the first thing we need to do is create any global variables we will need, and we will need a few.
With our variables created, we will start working in the Start() function. We only need to do 4 things here, get the CharacterController component which is attached to the player, get the MainCamera, and lock and hide the cursor so the player doesn’t see it while they are playing.
Once we have all that set up, we can start actually moving the player. A very simple type of movement can be accomplished in two lines

With simple code like this, we can make the player move left and right, and forwards and backwards, but that's about it.
The next thing we need to set up is turning the player’s head. To look around, the pitch will be controlled by the pitch of the MainCamera, and the yaw will be controlled by the yaw of the player game object. This prevents issues that could arise with the player’s head being 180 degrees facing behind them, but the body facing forward, and overall makes the calculations simpler and easier to understand.
With this added to our Update() function, we can look all around, and move in any horizontal direction!
Next up, we need to start on vertical movement, jumping and falling. This is a bit more complicated and will use some if else statements. First we need to detect whether or not the player is trying to jump, and if the player is grounded. If both conditions are satisfied, we can make them jump by setting the y velocity to our jump power, if not then we set the y velocity to what it was before we calculated any movement.
We’ve made the player go up, but now we need to make them come back down. In a new if statement, we check if the player isn’t grounded. If they aren’t, then we subtract from their y velocity 9.81 times Time.deltaTime, which accelerates the player towards the ground.
With this added, we can jump around and fall back to the ground to our heart’s content.
Next we will add a simple way to run. Inside of our velocity calculation, we check whether or not the player is holding down the run key, in this case it is the left shift key. Using a ternary operator, we can put a small if else statement into the calculation. If the player is holding it down, then we multiply their x and z velocity by runSpeed, if not, then we only multiply it by walkSpeed.

This line looks a bit complicated, but it is easier to understand in pseudocode.
Velocity = (the current forward direction * vertical input * runSpeed or walkSpeed) + (the current right direction * horizontal input * runSpeed or walkSpeed)
Now we can jump, fall, and run around!
There are only two more things that we need to add, a way to interact with the environment, and a way to lock the player out of controlling themselves.
The first is accomplished by sending out a raycast from the camera’s position whenever the player presses the interact key, which in this case is E. The objects that are hit are checked for if they meet our layer bitmask. I have set it to ~3, which resolves to 000100. The default bitmask is all ones, or the raycast can hit any layer. By setting it to three, we change the third layer, which I have named “Interactable”, but then the bitmask would be 111011, which makes us only able to not interact with that layer. By putting the tilde (~) in front of it, we invert the bitmask, making it 000100. When the raycast hits an object in the Interactable layer, we send a message to the object, telling it to run, if it has one, a function called “PlayerInteract”. When we make objects later on, we can put this function into the script we attach to the object, letting the player activate this bit of code.
The next part is much easier compared to interacting with other things. We simply put all of the Update() function inside of an if statement, checking for the playerLock variable. We can then make a function called TogglePlayerLock(), which lets us toggle whether or not the player is locked. Other scripts can access this function.
And with that, we have a fully functional player who we can drop into a scene!
Get Outset
Outset
| Status | Released |
| Authors | nrposey14, jamesNada, zhwilson, Landen Spencer, Ethan Spata |
| Genre | Adventure |
| Tags | Retro, Singleplayer |
More posts
- Bug HuntingJul 28, 2024
- Now Make it Look Like a PersonJul 22, 2024
- Trim SheetsJul 16, 2024
- The Sounds of the WorldJul 08, 2024
- Props Everywhere!Jul 01, 2024
- Bugs!Jun 24, 2024
- Modular AssetsJun 17, 2024
- The Quest ManagerJun 10, 2024
Leave a comment
Log in with itch.io to leave a comment.