Now Make it Look Like a Person

Like most models that are made in Maya, even sculpting a character can start as a cube primitive. They're a simple, stress free starting point to get to sculpting more intricate items—even ones that turn out round in the end.
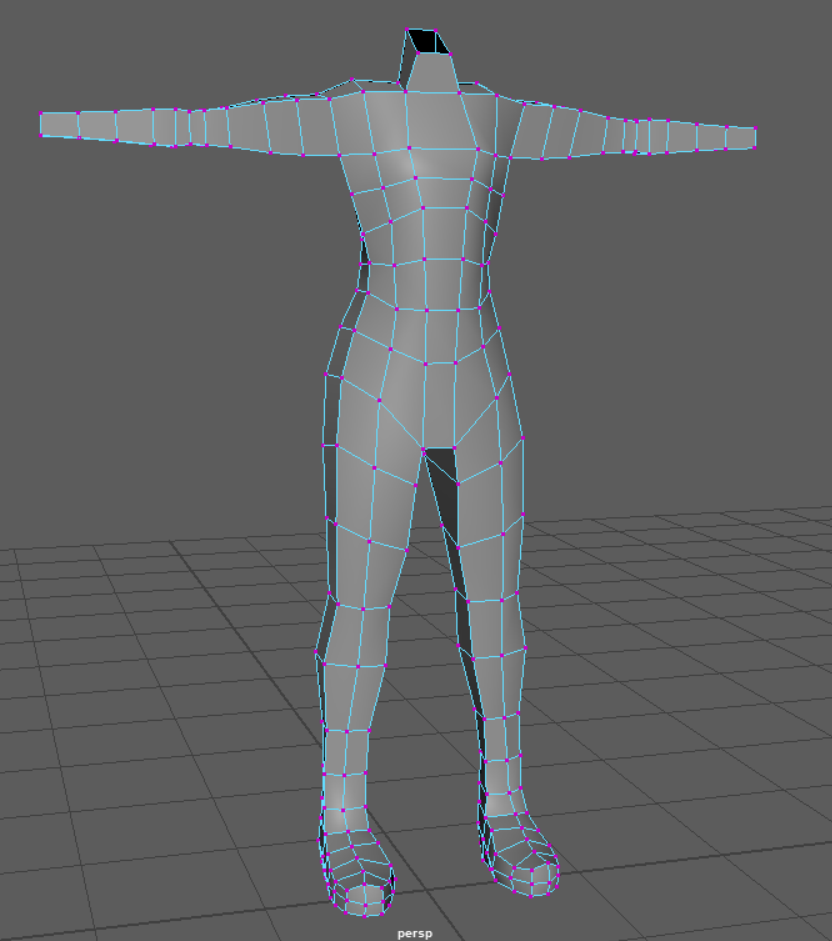
In the case of making a character, the cube will first act as the torso. You could technically disregard that advice and start anywhere you wanted, but you'd likely increase your chances of having some anatomy mishaps or subdivision issues. What I prefer to do is make a cube with about 3 or 4 subdivisions on each side and flatten it out a little bit, then get to shaping the front of the body first. Working in this way, you can really carve out the shape you want for the character's build by adjusting vertices and edges without having to worry about shaping the rest of the body with it yet. Once you get a shape you're satisfied with, then you can move on to molding the sides and the back. While I usually operate with symmetry turned on, I often turn this setting off when I need to manually make more subdivisions, as I've found in the past that Maya will occasionally make duplicate faces in areas you don't really want them to be. Those are not fun to find later when you're trying to create UVs.
When your torso is sculpted, you'll make your way down to the legs by extruding two faces downward from the bottom of the torso. I usually choose to pull it down to where I theoretically would like the knee to be, and then extrude it again to bring it down to the grid—stopping where you want the heels of their feet to go. This method can be adjusted in cases where you may be making a monster-type character or some other humanoid that's not quite as close to us anatomically, but for simplicity we're going to go with the standard human figure. Once these rough shapes are outlined and placed where you want them to be, you can do the same to the top of the torso and extrude the arms out straight to either side into a T-Pose.
The rest is just a careful manipulation of polys and adding more divisions where you'd like to achieve the shape you want.

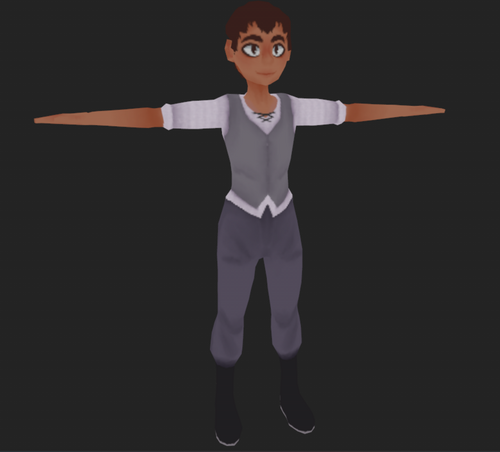
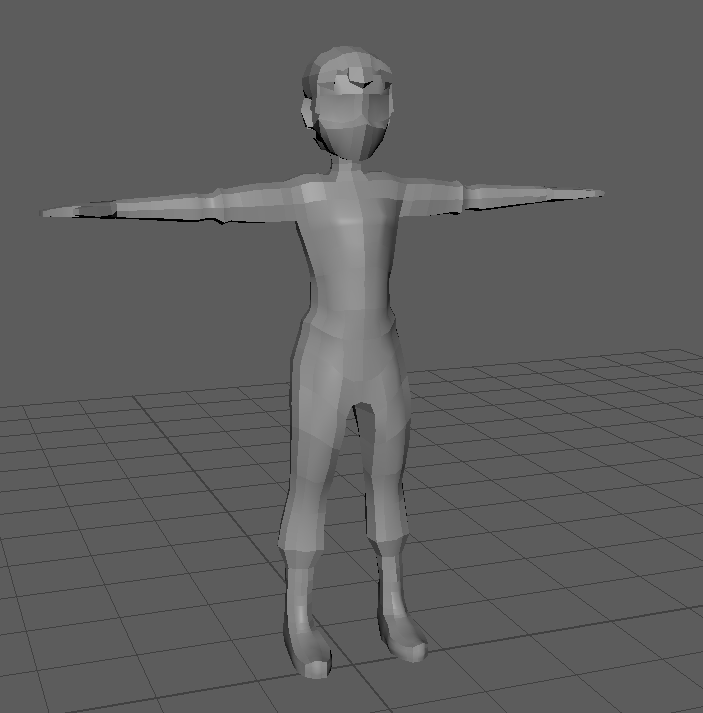
In more extensive and detailed characters, things such as clothing is often modeled on top of the body but not fused to it, but for the sake of keeping this character in-line with our low poly style, I opted to make it by simply extruding faces of the arms out a bit more to mimic sleeves and let the rest of the detail be provided by the clothing. Hands and the head are easiest to model by creating separate cubes with a low number of divisions and attaching them to the body afterwards; this makes it easier to add divisions as you need them quickly without having to worry about accidentally subdividing the entire model (I am very guilty of this).
Because I opted to only make one character model for every NPC in our game, I chose to make the hair, body build, and face very neutral and androgynous, and I could add more defining features later when it came time to paint. After about an hour or two of tweaking, we finally got a workable character! This was a nice little challenge for myself, as it was only my second time creating a game-ready character and my first creating it only from Maya.
Get Outset
Outset
| Status | Released |
| Authors | nrposey14, jamesNada, zhwilson, Landen Spencer, Ethan Spata |
| Genre | Adventure |
| Tags | Retro, Singleplayer |
More posts
- Bug HuntingJul 28, 2024
- Trim SheetsJul 16, 2024
- The Sounds of the WorldJul 08, 2024
- Props Everywhere!Jul 01, 2024
- Bugs!Jun 24, 2024
- Modular AssetsJun 17, 2024
- The Quest ManagerJun 10, 2024
- Simple Player ControllerJun 02, 2024
Leave a comment
Log in with itch.io to leave a comment.